# Validation of pay slips, annexes and other HR documents
💡 Reminder
The modules you have access to depend on the role assigned to you by your administrator. In order to validate documents, you must have the Validation role activated.
# Access the validation module
If this module is activated, you have the possibility to set up a validation step before the documents are finally transmitted.
When a deposit is made, once the document flow has been analyzed and sliced out by the platform, the user(s) with the Validation role will automatically receive an email indicating that documents are awaiting validation.
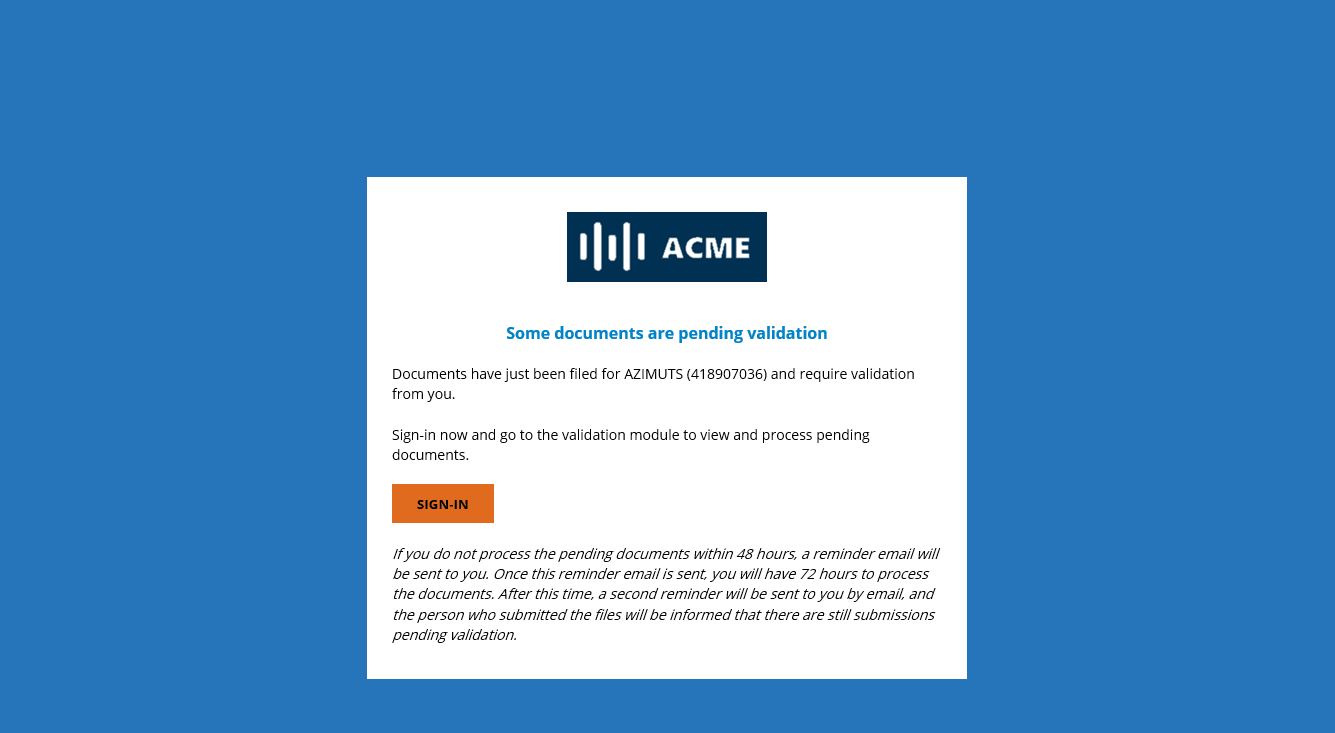
# Validation notification email
As a validator, click on the link in the email or log in directly to the portal and click on the Validation section to access the list of flows awaiting validation.
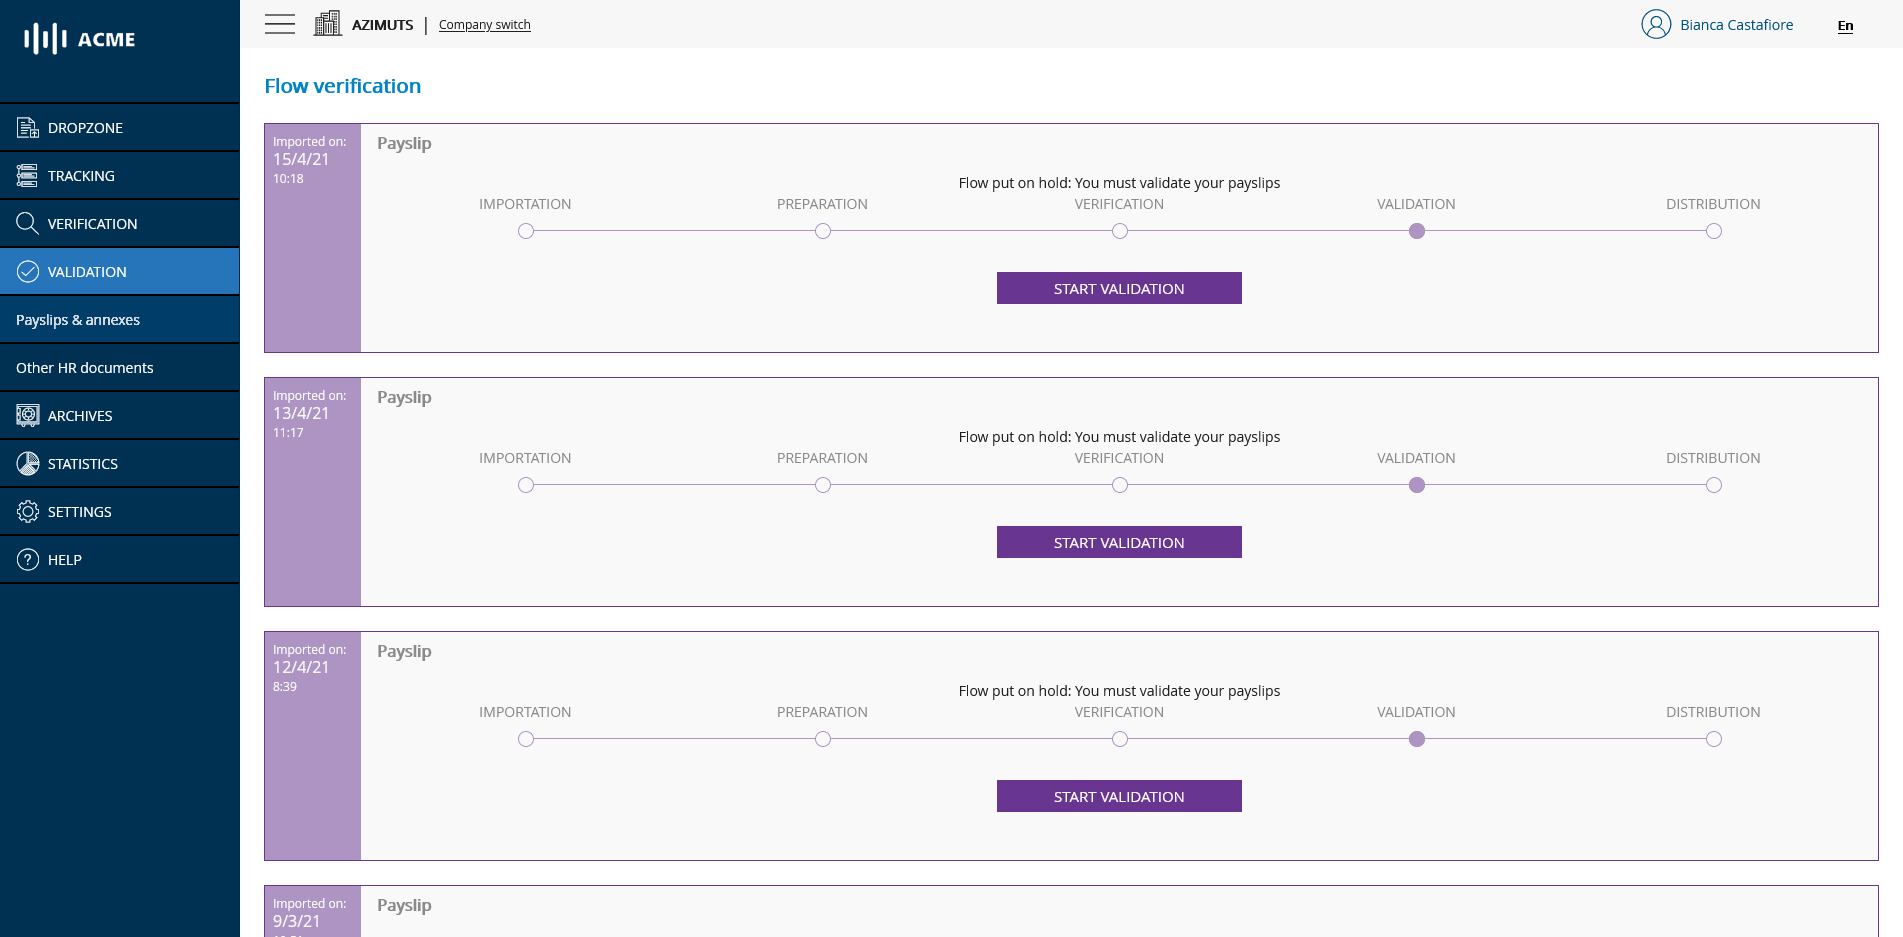
# List of flows to be validated
To validate a flow, simply click on the START VALIDATION button of the flow you wish to process. You will then be taken to the document validation page.

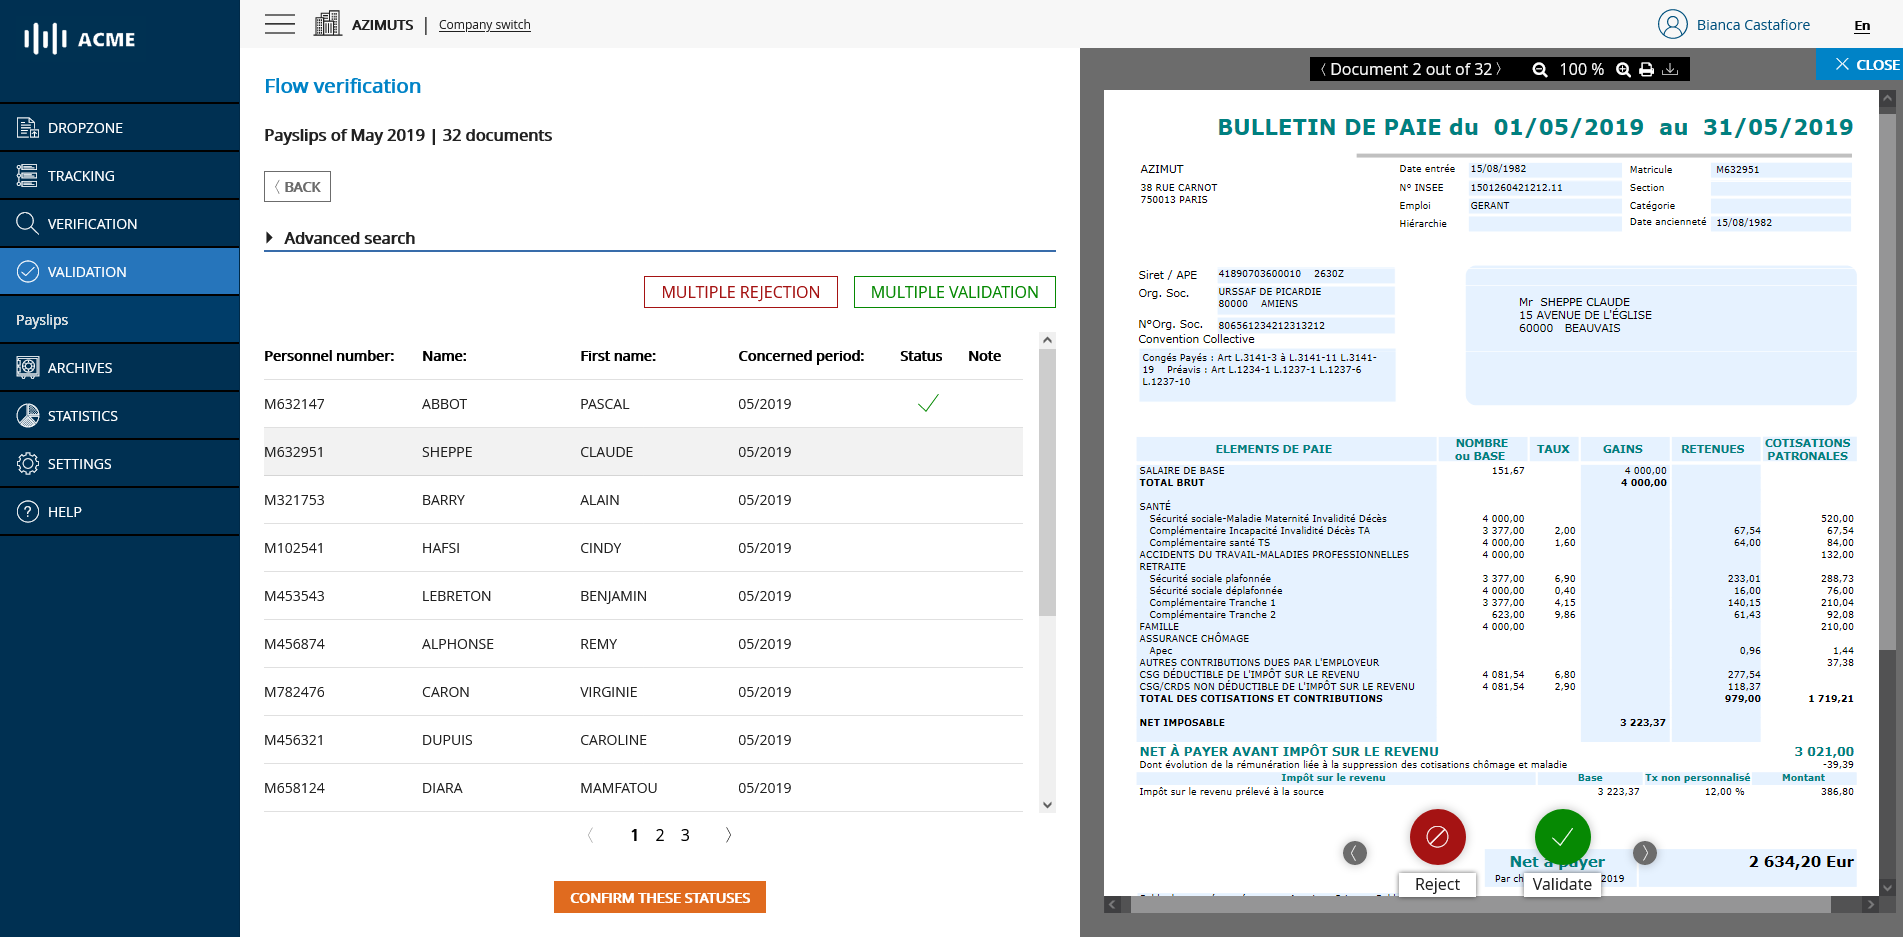
# Main validation page
# Validate documents that do not include an annex
The list on the left shows you the list of documents as they have been sliced and indexed by the platform, while the viewing panel on the right allows you to check the content of the selected document. If a selected document has several pages, you can view the following pages by scrolling down on the viewing panel.
Clicking on the validate button (in green) on the right panel will assign a validated status to the current document and automatically move to the next document.
# Validated document
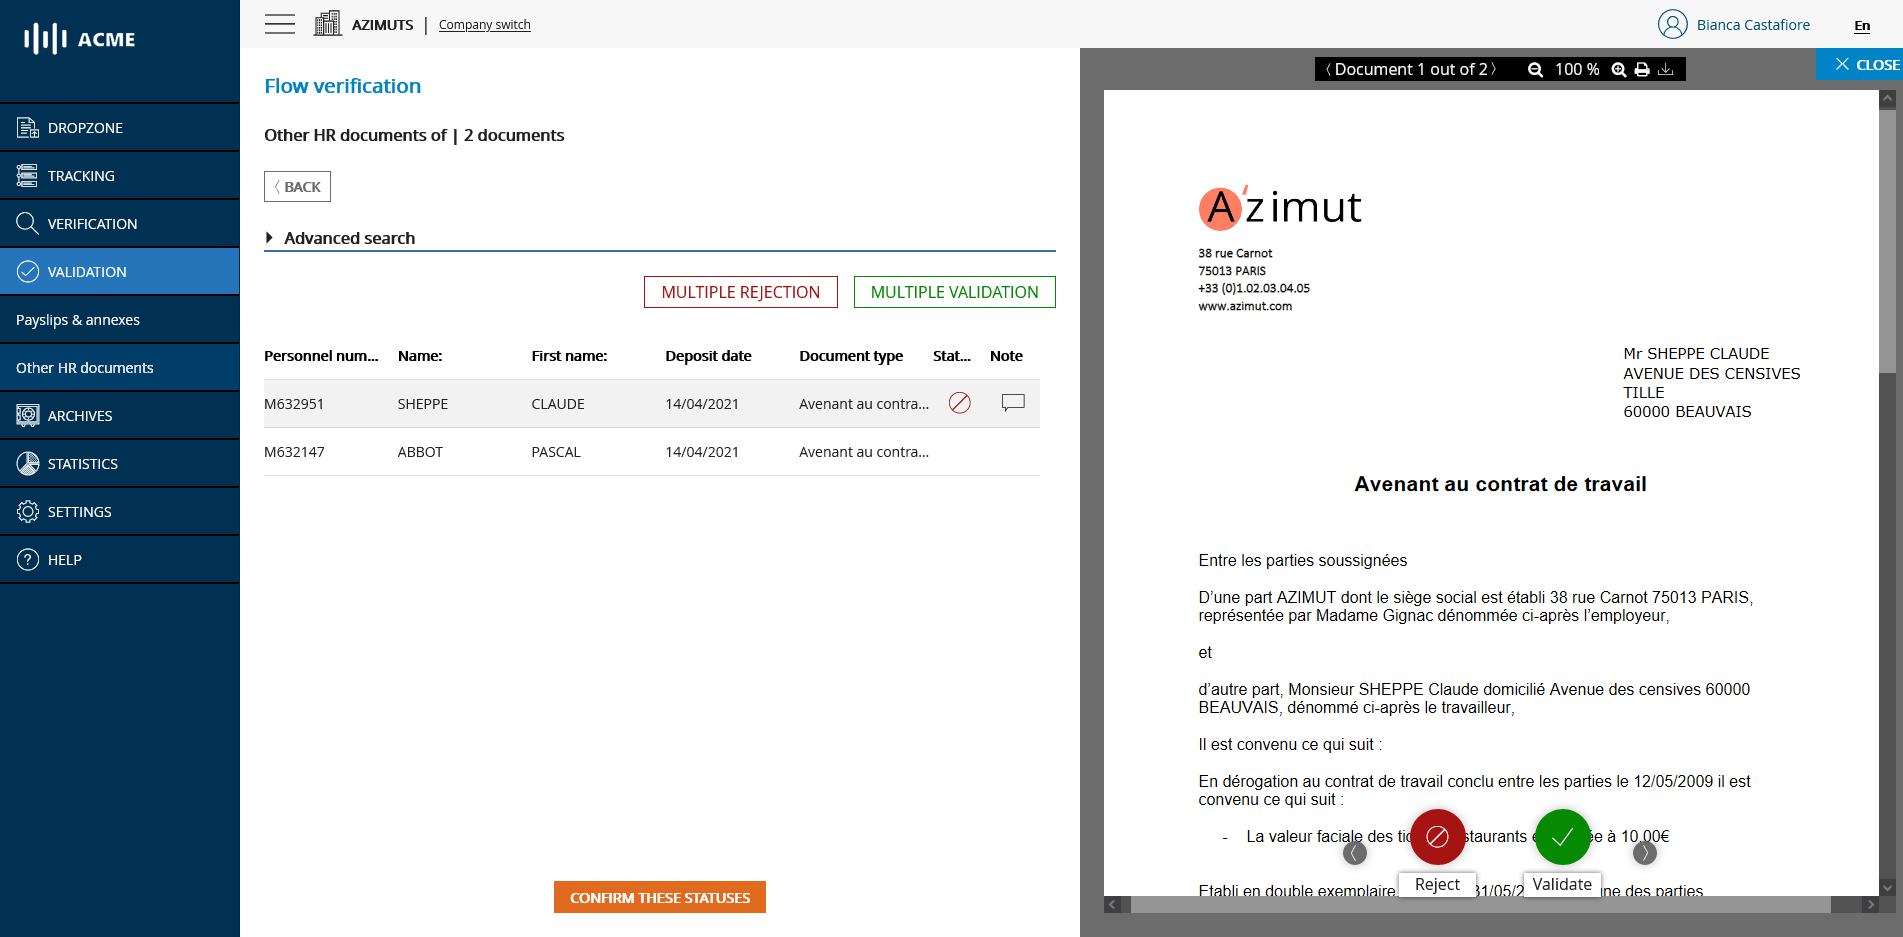
# Reject documents that do not include an annex
You can also reject a document by clicking on the reject button (in red). After clicking on reject, a window will ask you to indicate a reason for refusal. It is mandatory to enter a reason to reject. This reason is then transmitted to the depositor to allow him to understand the cause of the refusal and to file a corrected document as easily as possible.
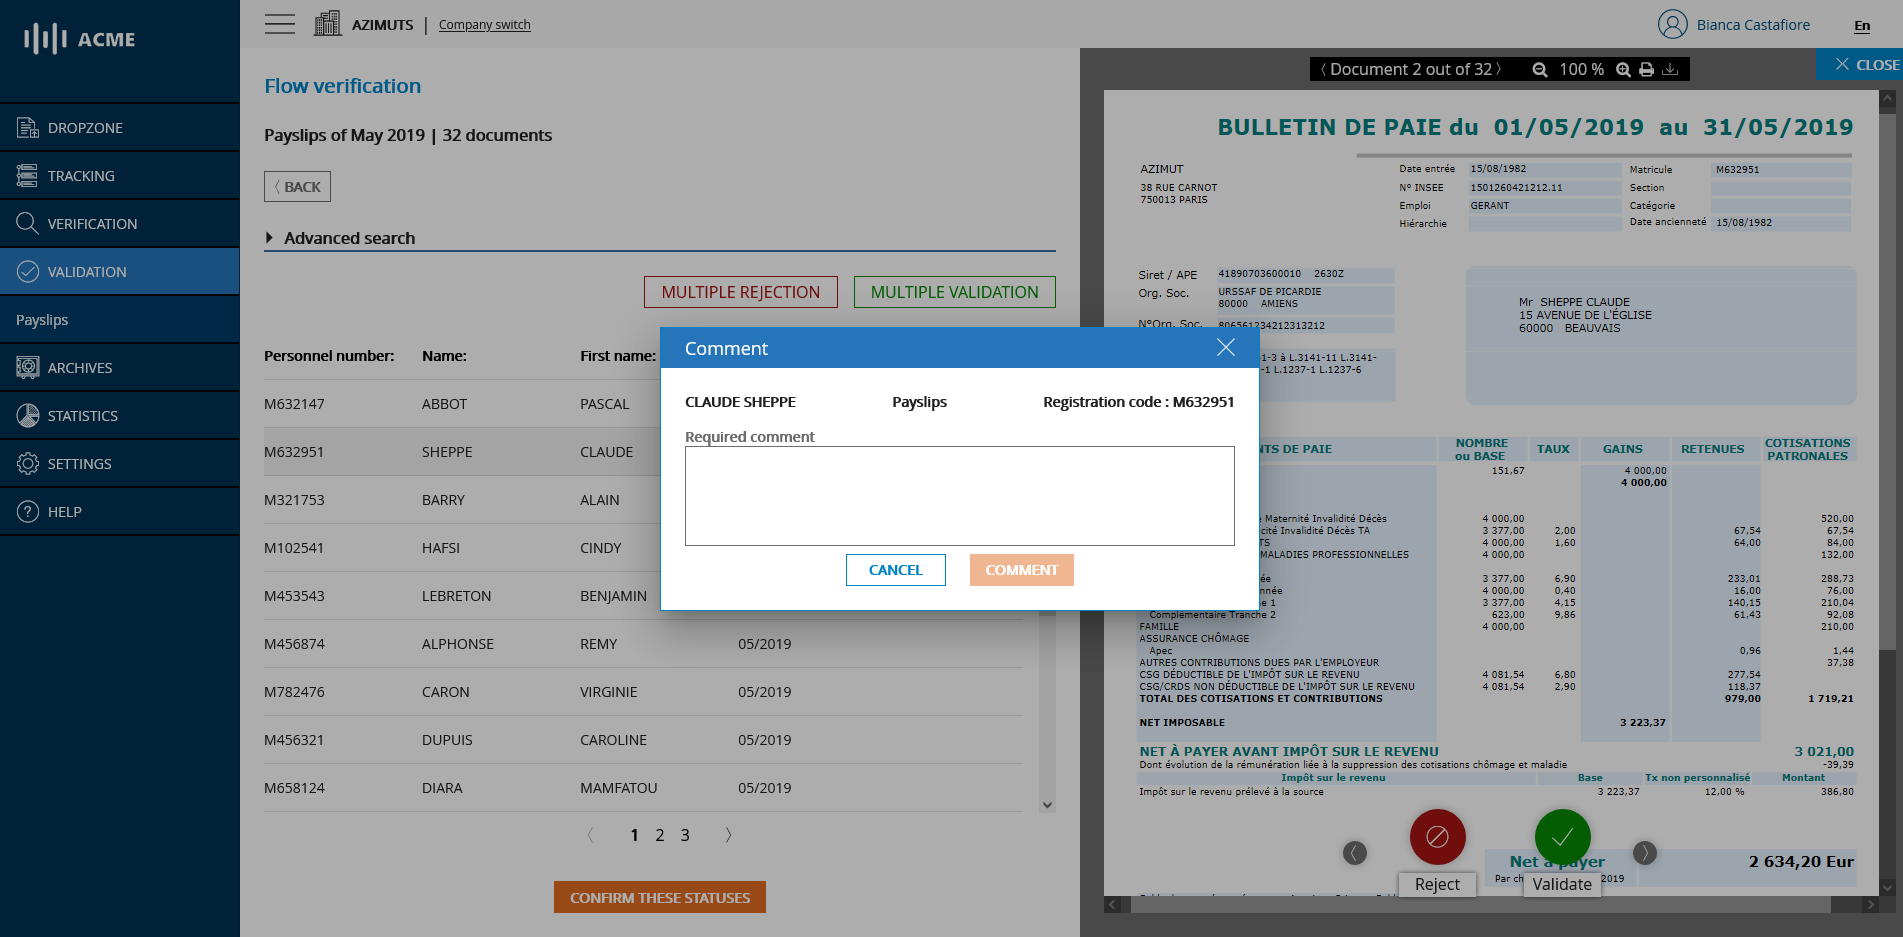
# Request for reason for refusal
Once you have given your reasons for refusal, the selected document becomes a reason for refusal. You can of course change your status or edit your reason for refusal (by clicking on the bubble icon in the table) as long as you have not confirmed your wish to finalize the validation stage by clicking on the CONFIRM STATUS button.
💡 Reminder
You can validate or reject documents in bulk using the Multiple Validation and Multiple Rejection buttons. After choosing one of these actions, a window will ask you if you want to apply the desired status to all the documents, or only to those that do not have a status yet.
# Confirm validation statuses
After assigning a validated or rejected status to all the bulletins in the flow, when you want to confirm your choice, click on the CONFIRM THESE STATUS button. A window will appear showing you the number of documents that have been validated, rejected and not yet assigned a status.
Note that you will not be able to definitively confirm until all documents in the flow have received a status.
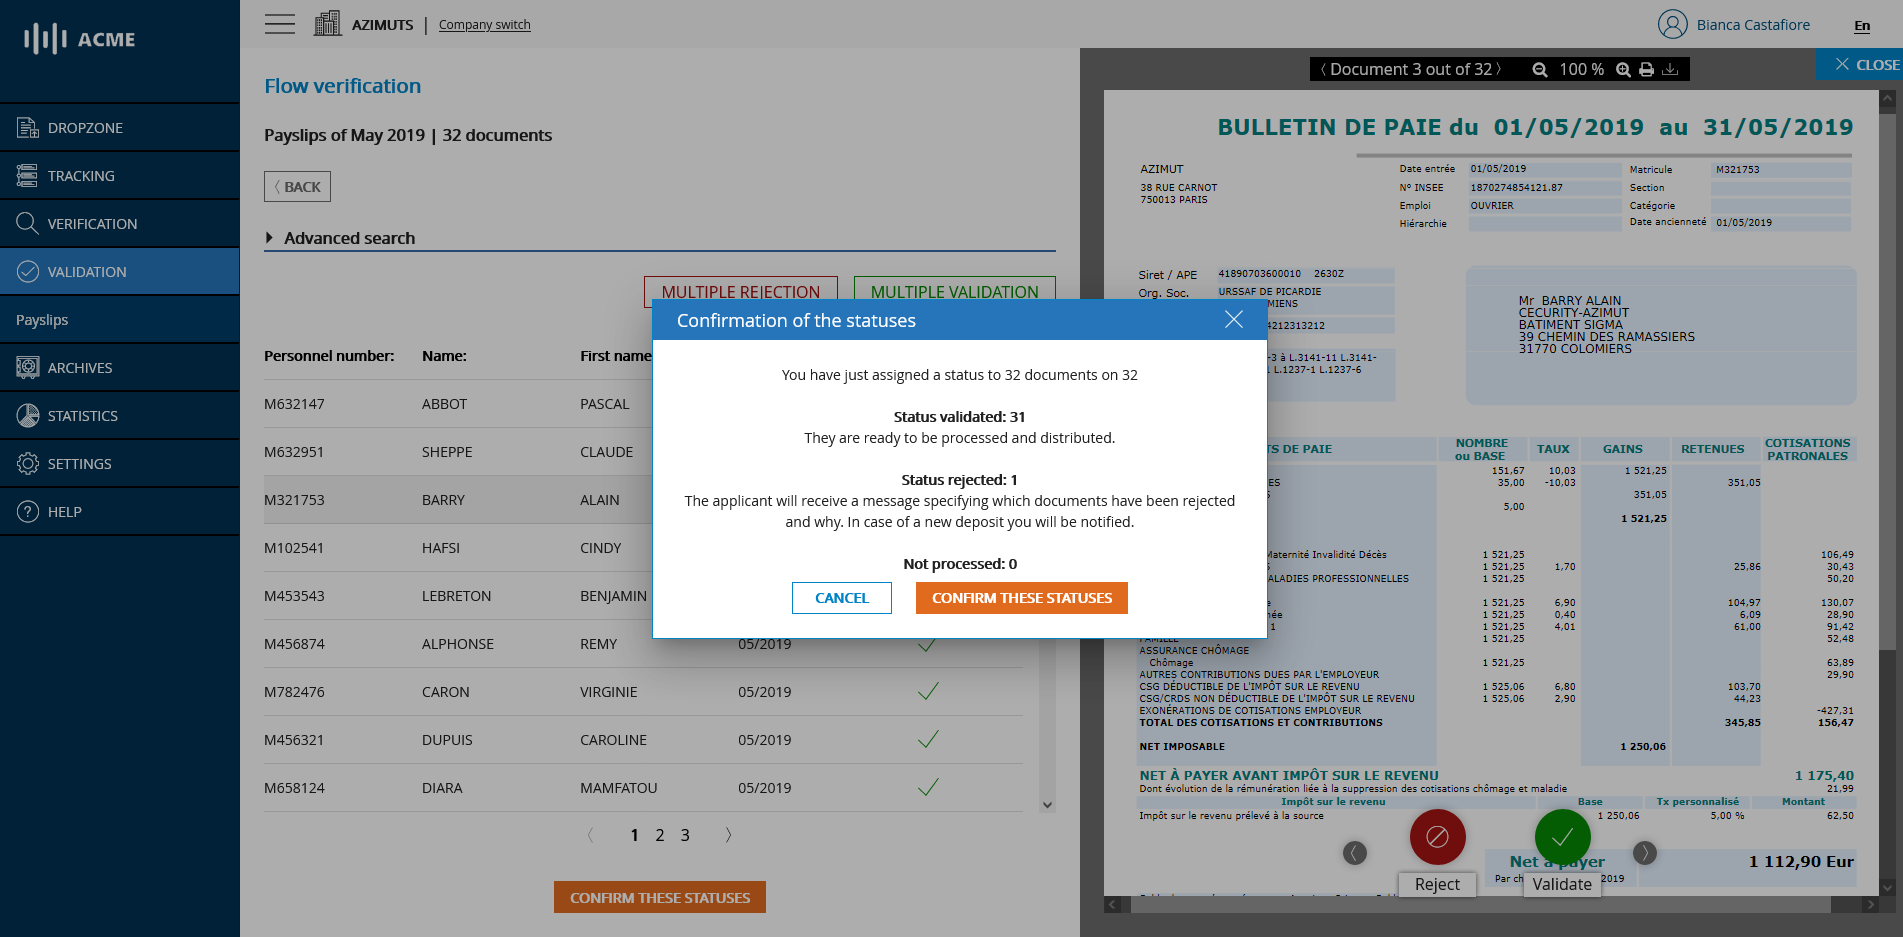
# Confirmation of validation status
Once your status has been successfully confirmed, a confirmation message will be displayed and you will be redirected to the list of feeds awaiting validation.

# Validation successfully completed
If all the flows awaiting validation have been processed, the list of flows awaiting validation will be empty.

# List of flows when they have all been validated
# Notification of the validation result
The person who submitted the flow then receives an email notifying them of the result of this validation phase.

# Notification email - Validation result
# Consult the result of the validation
The depositor can then view the documents and their status (accepted or rejected) directly from the SUIVI module by scrolling the corresponding flow. It is also possible to display only rejected bulletins by selecting Rejected in validation in the status filter.

# Flow Tracking Screen - List of documents with status
The user can also view the document of his choice by clicking on it. They can also view the corresponding commentary by clicking on the bubble icon in the flow list or in the right pane of the viewing page.

# Flow monitoring screen - Viewing a rejected document
After identifying the rejected documents and the reason for the rejection, the user will only have to file the corrected version of the rejected documents from the Dropzone module.
# Validate flows with annexes
The validation of flows with annexes works in the same way as for those without annexes with two additional elements:
- If a payslip includes annexes, it is possible to consult them.
- If a payslip is validated or refused, all its associated appendices will also be validated or refused.

# Flow validation screen - Document with annexes
# Validate other HR document flows
Validation of flows with other HR documents works the same way as for a simple payroll flow.